The template package you have downloaded consists of several folders. Let's see what each folder contains:
Screenshots
-contains template screenshot. Not for production.
theme
-contains wordpress theme files
" multipurpose-lawyer.zip "
-this folder contains all the necessary files for the theme.
"license.txt"
-contains license details
"readme.txt"
-contain information about theme images path, font use and usage script
Template Installation
Template installation is very easy process. The installation process can be done in two ways
1-Install a theme using wordpress admin
First thing you need to do is to login to your WordPress admin area. Next, click on
1. Go to the menu
Appearance >> Themes
2. Once you are on the themes page, click on the
Add New button at the top.
3. Click on Upload Theme button.
4. Click on Browse Button then select your multipurpose-lawyer.zip theme and click on install now button.
You need to activate your theme.
Congratulations your theme have been successfully installed
Setup Homepage Template
Follow the below steps to setup the Home page demo content.
1. Create a new page and name it as "Home" then select the template "Custom Home Page"
2. Go to Settings >> Reading
Select the option of Static Page, now select the page you created to be the homepage, while another page as per your wish.
Setup Global Color
In order to setup the Global Color , follow the below steps.
Go to Appearance >> Customize >> Theme Settings >> Global Color Settings
Here you can select color for the theme.
It will appear like this on the front end.
Setup Typography
In order to setup the Typography, follow the below steps.
Go to Appearance >> Customize >> Theme Settings >> Typography
Their customizer settings are like below screenshot.
1. Color: Here you can change the colors of all Paragraph, 'a' tag, 'li' tag, H1, H2, H3, H4, H5 and H6 respectively.
2. Fonts: Here you can change the Font Family of all Paragraph, 'a' tag, 'li' tag, H1, H2, H3, H4, H5 and H6 respectively.
3. Font Size: Here you can change the Font size of all Paragraph, 'a' tag, 'li' tag, H1, H2, H3, H4, H5 and H6 respectively.
Setup Topbar Section
1.In order to set up Social Icons.
Go to Appearance >> Widgets >> Social Icons
Here you can add social icons which will get appear at the topbar section.
Social Icons will be appear on the page like this.
In this way you can setup Social Icons Section.
2.In order to set up topbar section,
Go to Appearance >> Customize >> Theme Settings >> Topbar Section
Here you can add welcome text , e-mail address and request text with request link which will get appear at the topbar section.
For Enable the Top Header click on the checkbox and Give the Tob-Bottom padding to the topbar for the theme
For the sticky header of the theme click on checkbox.
Here you can select the Top-Bottom padding for sticky header of the theme.
For Show / Hide Search bar click on checkbox for the theme and Give the text for search placeholder.
Logo
In order to add the Logo:
Go to Appearance >> Customize >> Site Identity
Logo will be appear on the page like this.
In this way you can setup top bar Section.
Setup Header Section
In order to set header section, follow the below steps
Go to Appearance >> Customize >> Theme Settings >> Header
Here you can select the size of menu and case of menu of the theme.
Here you can add to Font Size of Social Icon for the themes.
Setup Slider Section
In order to setup the slider, follow the below steps.
1. Create a new Page and name it as "WE PRACTICE LAW SINCE 18TH CENTURY" , set it's featured image, title, and the content.Repeat this process for other slides.
2. Go to Appearance >> Customize >> Theme Settings >> Slider Section
Select the Page which you have created for slide1, slide2, slide3, slide4.
For show or hide slider, click twice on the checkbox.
For show or hide Slider Title , Slider Content , Slider Button , click twice on the checkbox.
Here You have an option to the speed of slider to load slider fast for the theme.
You can select the slider content alignment and slider excerpt length for the theme.
Here you can add Slider Button Lable for the theme.
Once you have done with this you will see the slider on your front page.
In this way you can setup slider.
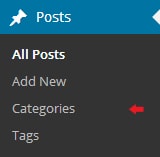
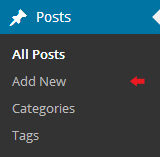
Practice Section
1. Go to Dashboard >> Posts
Add Posts.
2. Go to Dashboard >> Appearance >> Customize >> Theme Settings >> Practice Section
Post will be appear on the page like this.
In this way you can setup your Practice Section
About Section
1. Go to Dashboard >> Posts
Add Posts.
2. Go to Dashboard >> Appearance >> Customize >> Theme Settings >> About Section
Post will be appear on the page like this.
In this way you can setup your About Section.
Setup Footer Section
In order to setup the Footer Section, follow the below steps.
Go to Appearance >> Widgets
Once you add widgets to the footer, your footer will look like this.
In this way you can setup footer section.
In order to setup the Footer Section, follow the below steps.
Go to Appearance >> Customize >> Theme Settings >> Footer Section
For show or hide Back to Top Icon, click twice on the checkbox.
Here You can select the Back to Top Icon alignment for the themes.
From here you can select the Footer Background Image for the themes.
Here You can select the the number of footer columns and add your widgets in the footer for themes.
Setup Footer Text Section
In order to setup the Footer Text Section, follow the below steps.
Go to Appearance >> Customize >> Theme Setting >> Footer Text
In this way you can setup footer text section.
In order to setup the Copyright Section, follow the below steps.
Go to Appearance >> Customize >> Theme Settings >> Footer Section
1. Copyright Alignment: Here You have an option for Copyright Aligntment like Center , Left , Right.
2. Copyright Font Size: Here You have an option for Font Size of Copyright.
3. Copyright Top Bottom Padding: Here You have an option to Top Bottom Padding of Content for Copyright.
4. Copyright Text: Here you can add some Copyright text.
Setup Advance Options
In order to setup the Advance Options, follow the below steps.
Go to Appearance >> Customize >> Theme Settings >> Advance Options
Here You can click the checkebox if you want to Enable / Disable preloader.
Here You can select the color for preloader of the themes.
Here You can select the preloader type square and circle for the themes.
For Theme Layout:
Here You can select the Default layout for the themes.
After Default layout themes will look like screenshot
Here You can select the Container layout for the themes.
After Selecting Container layout themes will look like screenshot
Here You can select the Box-Container layout for the themes.
After Selecting Box-Container layout themes will look like screenshot
Setup Blog Settings
In order to Enable/Disale the Preloader,
Go to Appearance >> Customize >> Theme Settings >> Blog Settings
In Blog Settings, you can select the Blog Layout Sidebar.
In Blog Settings, you can show or hide post date, comments, author and also you can change blog excerpt Number for content.
Here you can select the Featured Image Border Radius for post of themes.
Here you can select the Featured Image Shadow for post of themes.
Here you can select the Pagination Style and Position of themes.
Go to Appearance >> Customize >> Theme Settings >> Button Options
Here you can select the Blog Post Button Label for themes.
Here you can Give the Top-Bottom, Left-Right , Padding to the Blog Post Button Label for themes.
Here you can select the Blog Post Button Radius for themes.
Setup 404 Page & Search Result Setting
In order to setup the 404 Page & Search Result Setting, follow the below steps.
Go to Appearance >> Customize >> Theme Settings >> 404 Page & Search Result Setting
1. 404 Page Title: error 404 page has a page title not found.
2. 404 Page Button Label: error 404 page Label of Button not found
3. No Search Result Title: error site title not found
4. No Search Result Text: error site contain not found
In this way you can setup 404 Page & Search Result Setting section.
Setup WooCommerce Options
In order to setup the WooCommerce Options, follow the below steps.
Go to Appearance >> Customize >> Theme Settings >> WooCommerce Options
1. Product per row: Here You have an option to add Number Of Product in one Row.
2. Product per page: Here You have an option to add Number Of Product in one single page.
3. Enable / Disable Shop page sidebar: Here You have an option to Enable / Disable sidebar of shop page.
4. Enable / Disable Product page sidebar: Here You have an option to Enable / Disable sidebar of product page.
5. Enable / Disable Related product: Here You have an option to Enable / Disable Feature Related product.
6. Button Top Bottom Padding: Here You have an option to add top bottom padding of Product button.
7. Button Border Radius: Here You have an option to add border radius of Product button.
8. Enable / Disable product border: Here You have an option to Enable / Disable product Outer border.
9. Product Top Bottom Padding: Here You have an option to top bottom padding for product.
10. Product Right Left Padding: Here You have an option to right left padding for product.
11. Product Border Radius: Here You have an option to give border radius to product.
11. Product Box Shadow: Here You have an option to give box shadow to the product.
12. Sale badge Position: Here You have an option to add postion of sale badge like right portions or left position.
13. Sale Top Bottom Padding : Here You have an option to add top bottom padding for sale badge.
14. Sale Border Radius: Here You have an option to add border radius for sale.
In this way you can setup WooCommerce Options section.
Setup Navigation
First of all create pages from go to Pages >> Add new page.
Go to Appearance >> Menu
Click on Create a new menu
Give a name to your menu in Menu name and click save menu button
Once you have create menu. You need to add pages by selecting with checkboxes. After adding menu list you can arrange it by drag and drop.
Select menu theme location from the below checkboxes
See this screenshot for better understanding.
Page Templates and sidebars
Default Template (the default page template with a right sidebar position)
Custom home Page (the custom home page template with right sidebar position)
Page with Left Sidebar (a page templates with left sidebar position)
Page with Right Sidebar (a page template with right sidebar position)


.png)