Luxury Travel Wordpress Theme Documentation

File Structure

The template bundle that you downloaded is divided into various directories. Let's examine the contents of each folder:

  • Screenshots -contains a screenshot of a template. Not for manufacturing.
  • theme -files for the WordPress theme
  • "luxury-travel-pro-1.0.zip and luxury-travel-pro-child-1.0.zip" -All of the files required for the theme are in this folder.
  • "license.txt" -includes licence information
  • "readme.txt" -provide information about the theme's image paths, font use, and script usage.

ACTIVATION OF TG KEY

The steps for activating a TG Key are as follows.

As you will get the License Key on your Email, use that key to Activate License.

Follow the following Process to Activate License.

Go to Dashboard >> Appearance >> TG Key Activation >> Enter Key>>Save Changes.

After Key Entry, select Activate License.

After you Activate Licence,the key will be active and then you can Getstarted with the Theme.

In this way you can activate your Licence Key.

Template Installation

Installing a template is a simple process. There are two ways to complete the installation process.

1-Using WordPress admin, install a theme.

The first step is to log in to your WordPress admin dashboard. then click on

1.Go to the menu Appearance >> Themes


2. Click the Add New button at the top of the themes page after you've arrived there.


3.To upload a theme, click the button.


4.Choose the luxury-travel-pro-child-1.0.zip theme by clicking the Browse button, and then hit the Install Now button.


5. Your theme will now be installed by WordPress, and you will see a success message with a link to activate it or view a live preview.

Congrats! You've successfully installed your theme.

Section Color/Font Pallette

Color/Font is very easy process. We have given these options in all sections of customizer. It is a complete image to show you about color and font pallete. At a single glance of click you can set the color and fonts of the Headings,Paragraph and Buttons

Depending on the number of options accessible in each area, there is an option to change the colour scheme for the headings, title/text, paragraphs, button text, and button background.

Default Color/Font settings

Fetch Demo content

This theme supports the standard Site Identity area that WordPress provides, and we have added some options to this section.

To set up your home page, follow these directions.

  • 1. Create Page to set template: Go to Dashboard >> Pages >> Add New Page.

    You can label it anything you like, such as "home." then choose the "Custom home page" template from the template options.


  • 2. Set the front page: Go to Setting -> Reading --> Set the front page display static page to home


  • When you're finished, you can view the entire demo on the top page.

Typography Settings

The simple method for setting or modifying the site's colour and fonts is called "color/fonts setting."
    1. Go to Options for Typography > Appearance > Customize > Theme Settings

        The choices included in this section are as follows:

      • Headings (h1, h2, h3, h4, h5, h6) Font family

This area offers the ability to change the font family used for paragraphs and other website content.

      • Font family for the paragraph and additional content

 This area offers the ability to change the font family for all of your website's headlines.

  1. Now, click on Publish button.

How to set up Home Page

Setup Social Icon

To configure the Social Icon Section,

Go to Appearance >> Customize >> Theme Settings >>Social Icon Section


To configure Social Icon, adhere to these directions.


  • Add Facebook Link: You can add facebook link here and the facebook icon will be displayed in the top bar of your site.
  • Add twitter link : You may use this option to add a Twitter link to your website's top bar. The Twitter icon is added to your site's top bar when you add a Twitter link.
  • Add Instagram Link:Here, you can link to Instagram and provide the top bar an Instagram icon.
  • Add Youtube Link: You may add a link to YouTube here.
  • Add Pinterest link : You can add a link to Pinterest using this option. The Twitter icon is added to your site's top bar when you add a Twitter link.


Setup Slider


To set up the slider, adhere to the procedures below.

Go to Appearance -> Customize -> Theme Settings -> Slider Settings


  • Setting Options : Contains options for the Service display enable/disable option. This option allows you to enable/disable this paragraph. This environment is crucial. If you want this section to show on your website, leave the option enabled; if you don't, pick the disable option, and this section will no longer be visible on your website.
  • Number of Slider To Show: Allow you to select no. of slider you would like to display.
  • Slider Image: The photos for the slider can be set here.
  • Slider Button Text: Here, you may choose what text should appear on the button.
  • Slider Heading Color: Permit setting the slider's header colour.
  • Slider Heading Fonts: With this option, you may change the typeface for the Slider heading.
  • Slider Text Color:You can choose the colour of the slider text with this option.
  • Slider Text Fonts: With this option, you may change the typeface for the Slider heading.
  • Button Text Fonts: It enables you to select the font of the text that will appear on buttons.

Setup Search Tours

To continue with the Search Tour Section,

Go to Appearance -> Customize -> Theme Settings -> Search Tour section

Setup Featured Tours


Follow the procedures listed below to set up the following section.

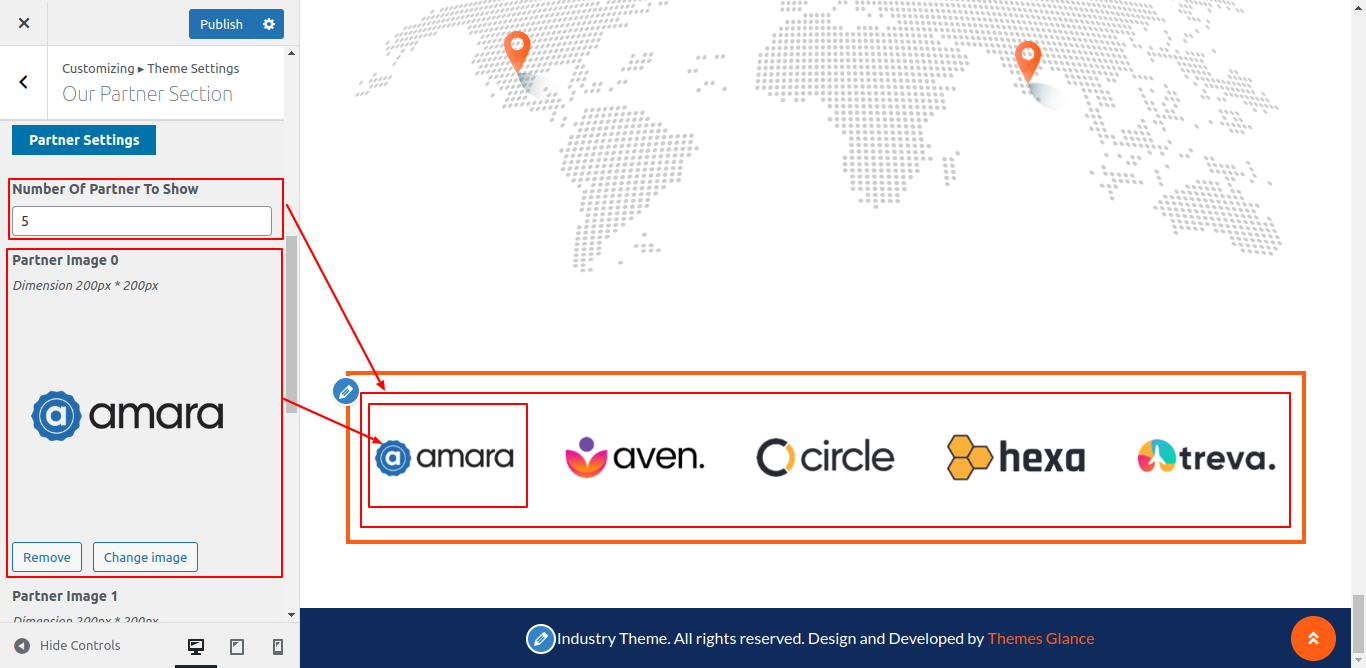
1. Go to Dashboard -> Tours -> Add New

2. Add the tours, set a respective category then Go to 
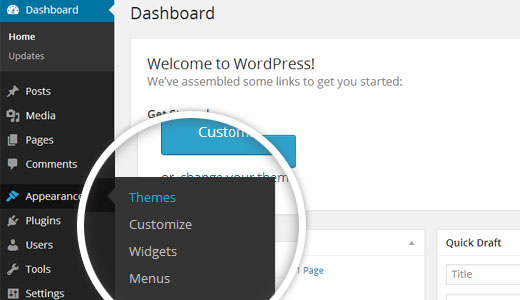
Appearance -> Customize -> Theme Settings -> Featured Tours

3. You can choose the category to display the appropriate excursions there. As a result, you can choose the category that you created using the Add New Tour option here.

4. Moreover, you can change the background and text colours in that section.


Do you want this section: You have the option to completely "enable" or "disable" this section in this section. If you decide that you do not want this area on your website, simply select the deactivate option, and the section will be removed. And if you want this lovely area to show up on your website, just enable it, and it will.

Now follow these further steps to setup this section.

Background Color: The background colour of this section can be changed using this option. The screenshot's background is blue, as you can see. Similar to that, you can choose any backdrop colour you choose.

Background Image: You can choose an image to serve as this section's background by using this option.

Section Title Color: You may choose the text colour for the section's title here.

Section Title: Simply enter the title of this section here. Featured Tours is the name of this section in the screenshot. Similarly, you are free to alter as you choose.

Section Title Color: You can choose the colour of the section title's text with this option.

Section Title Fonts: You may choose the typeface for the title of this section using this option.

Select Category: This is a crucial choice. Now, you must choose the category that you created using the Add New Tour option.

Number of columns to show: You can choose the number of image columns to be shown in this section using this option. The screenshot above shows that there are four image columns. You may also adjust it to 3, 5, 6, 7, etc.

Hover Icon Image: The image symbol that will show up when you hover over the featured image can be configured here. This hover symbol image can be customised for each featured image. For each featured image, a choice is offered.

Box Background Color: Here, you can set the background color for image columns. You can see in the screenshot that its blue. Likewise you can set any background color for image column.

Box Title Fonts: Here, you can set the font of the title which appears with every featured image. Here, you can see in screenshot above, The TajMahal Aagra is the box title.

Box Hover Text: You can choose the text's font here for when it appears when the user hovers over a featured image.

Setup Content Image Slider

In order to setup the following section go to Dashboard -> Tours -> Add New

Add the tours, set a respective category then Go to Appearance -> Customize -> Theme Settings -> Content Image Slider

You can choose the category to display the appropriate excursions there. Moreover, you can change the background and text colours in that section.


To continue with the Content Image Slider Section

  • Setting Options: Includes settings for Service display enable / disable option.
  • Background Color: The background colour of this section can be changed using this feature.
  • Background Image: In this section, you have the option of setting a background image.
  • Select Category: From this page, you can choose from categories including Top Sellers, Featured Tours, and Recent Tours.
  • Slider Title Color: You can choose the colour of the section's slider title with this option..
  • Slider Title Font: You can choose the section's slider title font with this option.
  • Slider Text Color: You can choose the colour of the section's slider text with this option.
  • Slider Text Font: You can choose the section's slide text font with this option.

Setup Deals And Discounts


In order to setup the following section go to Dashboard -> Tours -> Add New

Add the tours, set a respective category then Go to Appearance -> Customize -> Theme Settings -> Deals And Discounts

There is a choice to display the appropriate tours according to the category. Moreover, you can change the background and text colours in that section.

The most crucial element with which you must exercise caution while setting up this part is entering the comparison price for each post when you create it. Just the post will appear in this part if you specify the comparison price when setting up the post; otherwise, it won't.


To continue with the Deals And Discounts Section

  • Setting Options: includes options to enable or disable the service display.
  • Background Color: The background colour of this section can be changed using this feature.
  • Background Image: In this section, you have the option of setting a background image.
  • Section Title: You may customise the title of this section using this option. As seen in the screenshot above, the title is Deals & Discounts, but you can change it using this option.
  • Section Title Color: You can choose the colour of the title for this section using this option.
  • Section Title Fonts: You can choose the font family for the title of this section using this option.
  • Section Box Text Color: You can choose the colour of the text that displays inside the box using this option. On the screenshot up above, you can see that it is black. You can also change the text's colour.
  • Section Box Text Font: You can choose the font family for the text inside a box using this option.
  • Button Background Color:You may use this option to change the button's background colour in this area. The screenshot clearly shows that it is black. You can also set.
  • Button Background Hover Color: You may choose the background colour of the button that will appear when you hover over it using this option.

Setup Tour Type

In order to setup the following section, go to Dashboard -> Tours -> Add New

Add the tours, set a respective category, then Go to Appearance -> Customize -> Theme Settings -> Tour Type

There is a choice to display the appropriate tours according to the category. Moreover, you can change the background and text colours in that section.


Add the contact-form-7 plugin to the dashboard plugin and turn it on to reserve the destination tour. The dashboard will show an area for contacts; after that, create the form. See the screenshot below for additional information.


To send a message, enter the recipient's receiver mail id in the to box and the domain mail id in the from field. See the screenshot below for additional information.

Then, Go to Appearance -> Customize -> Theme Settings -> Tour Inquiry Settings

Write the shortcode you produced after establishing the contact form in the customizer's Tour Enquiry Settings section, as shown below.

Then click on the picture or title to make a reservation.

See the screenshot below for additional information.

Setup Tour Type by following these directions.

  • Setting Options: Includes options to enable or disable the service display.
  • Background Color: The background colour of this section can be changed using this feature.
  • Background Image: In this section, you have the option of setting a background image.
  • Section Title: You can set the section title for the slider using this option.
  • Section Title Color: You can choose the colour of the section's slider title with this option..
  • Section Title Font: You can choose the section's slider title font with this option.
  • Box Background Color: You can choose the section's box background colour with this option.
  • Box Title Color: You can choose the section's box title font with this option.
  • Box Title Fonts: You can change the box title font for the section using this option.

Setup Testimonial / Guest Speak Section


In order setup the following section go to Dashboard -> Testimonial -> Add New

Appearance -> Customize -> Theme Settings -> Testimonial / Guest Speak

The background colour and text colour of that area can both be changed.


To set up testimonials, adhere to these guidelines.

You must go to the dashboard and select testimonials in order to add testimonials. Like this, you can add or change testimonials.

  • Setting Options: contains options for turning on and off the service display.
  • Section Title Color: Here, you can change the title's text colour for this part.
  • Section Title Fonts: You can choose the font family for the section's title here.
  • Section Testimonial Color: For this part, you can choose the text colour for the testimonials here.
  • Section Testimonial Fonts: You can choose the testimonial font family for this part here.
  • Section Testimonial Desig and Name Color: The text colour for the testimonial Designation and Name can be changed here.
  • Section Testimonial Desig and Name Color: Here, you can change the testimonial Designation and Name's font family.
  • Background Color: Here, you can change the testimonial Designation and Name's font family.
  • Background Image: You may choose the background image for this section using this option.
  • Section Title: You can enter the title of this section here.

Setup Why Our Tours


How to Continue with Why Our Tours

Go to Dashboard -> Tours -> Add New

Go to Appearance -> Customize -> Theme Settings -> Why Our Tours Section


To continue with the Deals And Discounts Section

  • Setting Options: Includes settings for Service display enable / disable option.
  • Background Color: The background colour of this section can be changed using this feature.
  • Background Image:You can use it to change the background picture for this section.
  • Section Title: Enter the title of this section here.
  • Section Title Color: You can choose the text colour for the section title using this option.
  • Section Title Fonts: You can choose the font family for the title of this section using this option.
  • Box Background Color: You can choose the box's background colour with this option. As you can see in the screenshot up top, the box's backdrop is white. The background colour of the box can also be changed to any colour you like.
  • Box Text Color: You can choose the colour of the text inside the box using this option.
  • Box Text Fonts: You can choose the font family for the box text with this option.
  • Number of services to show: You can choose how many service boxes you want to appear in this area by using this option. The number of services is six, as shown in the screenshot. That value is up to you to set.
  • Service Image:You can choose the section's button background hover colour with this option..
  • Service Text: You can add text using this option to each service box in this section.

Setup Our Records


If you want to continue with Our Records,

Go to Appearance -> Customize -> Theme Settings -> Our Records Section


    Do you want this section: This section allows you to enable/disable this entire section. If you decide that you do not want this area on your website, simply select the deactivate option, and the section will be removed. And if you want this lovely area to show up on your website, just enable it, and it will.

  • Background Color: The colour of this section's backdrop can be changed here.
  • Background Image: The background picture for this section can be changed here.
  • Text Color: Here, you can modify this section's text colour.
  • Text Font Family: You can choose the font family for the text in this section using this option.
  • Number: You can specify the quantity of any records you wish to display in this field.
  • Content: You can enter the record's information here.

Setup Partners Section


To move forward with Partners,

Go to Appearance -> Customize -> Theme Settings -> Partners Section


To set up Partners Section, adhere to following directions.

  • Do you want this section: This section allows you to enable/disable this section altogether. If you decide that you do not want this area on your website, simply select the deactivate option, and the section will be removed. And if you want this lovely area to show up on your website, just enable it, and it will.
  • Section Title Color: Here, you can change the title's text colour for this part.
  • Section Title Fonts: You can choose the font family for the section's title here.
  • Background Color: The colour of this section's backdrop can be changed here. This section's background is white, as can be seen in the screenshot. You can change the hue to whatever one you like.
  • Background Image: This is where you may change the background image for this section.
  • Number of Partners to show:The number of partners you want to display in this area can be entered here.
  • Sponsor Image: For any partner you want to display in this section, you can set the sponsor image here.

Setup Footer Section


To continue with the Footer,

Go to Appearance >> Customize >> Theme Settings >>Footer Section


Follow these instructions to setup Footer Section.

  • Footer Heading Color: You can choose the colour of the footer's header here.
  • Footer Heading Fonts: The font for the heading and footer can be changed here.
  • Footer Content Color: Here, you can change the font colour for the footer's contents.
  • Footer Content Fonts: The font for the footer's contents can be changed here.
  • Footer Border Color: You can choose the colour of the footer's border here.
  • Do you want this section: You have the option to completely "enable" or "disable" this section in this section. If you decide that you do not want this area on your website, simply select the deactivate option, and the section will be removed. And if you want this lovely area to show up on your website, just enable it, and it will.
  • Background Color: Here, you can change the footer's background colour.
  • Background Image: If you'd like, you may change the background image for the footer here..

Footer have four columns. You can add any widget there. It will be added from Appearance -> widget

Plugins

The functionality that already exists in WordPress can be expanded and enhanced via plugins.
How to activate plugins

If you want these features in your theme, you must activate the plugin. In order to activate the plugin in your theme, follow these instructions.

Go to Plugins >> Installed Plugins >> Luxury Travel Pro Post Types >>Activate


When you enable the plugin, two additional choices, namely Tours and Testimonials, will appear in your admin navigation. Because the plugin is active, you may see these two options in the image's admin navigation.

Once you enable the plugin, these two sections are instantly added to your website. This is a screen image of the same.

You can see that some sections have been added, but their contents are missing. Use these guidelines when adding content to these areas.

To add Tours, Go to Tours >> Add new


You can add photographs to these sections using the Add Media option, as you can see in the snapshot, and they will automatically be uploaded to Recent Tours in accordance with the particular Tour you add.

As indicated in the image above, you can now add the Tour's title and description.

Tour information can be added here.


  • Price: You can enter the tour price here.
  • Compare Price: Compare prices can be added here.
  • Tour ID: Here, you can add a tour ID.
  • Tour Type: Here, you can add a tour type.
  • Tour Status: Here, you can add a tour status.

Whenever you begin including details like this on tours. The information about this tour will automatically display on your website,

Once you have finished adding Tours, you can view the Most Recent Tours here./p>

As seen in the screenshot below, the photographs you add using this option are displayed on the tour website's image slider.


You can build up Newest Tours in this manner.

    To add Testimonials, Go to Testimonials >> Add new


    You can add testimonies images to this area using the Add Media option, which is visible in the snapshot. These photographs will immediately upload to the testimonies section.

    Here, you may now include the person's name and a testimonial.

    You can add Designation of person here


    Designation: Here, you can enter the testimonial person's designation.


    You can add an image of a testimonial subject, which is immediately uploaded in the Testimonials area in accordance with the particular testimonial you provide, using the Add Media option that you can see in the snapshot.

    You might see the same thing on your website after posting testimonials. Check out these screenshots.


    You can build up testimonials in this manner.

TG-Title-Banner-Image

The following option will be present inside every page, post, registered post, etc. when you activate this plugin.


1. You must first decide the banner image you want to use on your post or page.

2. By default, the title will be shown above the banner image when uploading any file.


3.If you don't want the title to appear on the banner, you can use this plugin to conceal it by selecting the "Hide Title above banner" option.

4. By selecting the "Display Title below banner" option, you may even display the title below the banner image.

5. When neither a file nor an option is selected, the title will be shown in its default format.

Child Themes and Hooks

The simplest way to edit the website is with a custom theme editor. If a section has to be added to the website, it is simple to modify in the child theme and can be modified in the parent theme.

Hook Code After Slider

Hook Code After Navigation

Hook Code After Search Tour

Hook Code After Featured Tour

Hook Code After Content Image Slider

Hook Code After Deals And Discounts

Hook Code After Tour Type

Hook Code After Guest Speak

Hook Code After Why Our Tour

Hook Code After why Our Tour

Hook Code After Partner

Templates for pages and sidebars

Page Templates

  • Default Template (the default page template with a right sidebar position)
  • Page (Left Sidebar) (a page templates with left sidebar position)
  • Page (Right Sidebar) (a page template with right sidebar position)
  • Blog (Full Width) (a blog templates with one column without sidebar)
  • Blog (Left Sidebar) (a blog templates with left sidebar position)
  • Blog (Right Sidebar) (a blog template with right sidebar position)
  • Contact Template (the default Contact template with no sidebar position)
  • Home Page Template (the default home page template with right sidebar position)

Post, Categories and Post Formats


Adding category

For further details on adding categories, look at the following article: http://codex.wordpress.org/Manage_Categories_SubPanel

  1. Access your WordPress Administration Panel by logging in (Dashboard).
  2. Click the Posts tab.
  3. With that done, click Categories for blog posts.
  4. Your new category's name should be typed in.
  5. After that, click the Add New Category button.
Click the Publish button.

Creating a Blog post

  1. Access your WordPress Administration Panel by logging in (Dashboard).
  2. Click the Posts tab.
  3. Click the Add New tab.
  4. Type in your post content. For more information on adding posts, please check the following link http://codex.wordpress.org/Posts_Add_New_SubPanel.

Shortcodes

A shortcode is an effective tool for creating content. http://codex.wordpress.org/Shortcode. Using shortcodes is simple. Make sure that Visual editing mode is selected first.


Check out the Themes' list of available shortcodes:

Fetch All the Tours: [all_tours]

Fetch All the Testimonials: [testimonials]

Widgets

Additional Theme Addons

How to Setup Additional Theme Addons:

1.The plugin must first be downloaded from the source (it will be available as a zip file named tg-title-banner-image.zip and tg-gallery-images.zip). Then, click the Plugins » Add New page in the WordPress admin area.


2. After that, click on the Upload Plugin button on top of the page.

3. This will bring you to the plugin upload page. Here you need to click on the choose file button and select the plugin file you downloaded earlier to your computer.


4. After choosing the file, you must select the install now option.


5. The plugin file from your computer will now be uploaded to WordPress, where it will be installed. After installation is complete, a notice like this will appear.

6.To use the plugin after installation, click the link that says "Activate Plugin."

TG-Title-Banner-Image

After this plugin is activated, every page, post, registered post, etc. will have the following option.


1. You must first decide the banner image you want to use on your post or page.

2.By default, the title will be shown above the banner image when uploading any file.

3. If you don't want the title to appear on the banner, you can use this plugin to conceal it by selecting the "Hide Title above banner" option.

4. By selecting the "Display Title below banner" option, you may even display the title below the banner image.

5. When neither a file nor an option is selected, the title will be shown in its default format.