Multipurpose Portfolio Pro Theme Documentation

File Structure

The template bundle that you downloaded is divided into various directories. Let's examine the contents of each folder:

  • Screenshots -contains template screenshot. Not for production.
  • theme -contains wordpress theme files
  • "multipurpose-portfolio-pro.zip" this folder contains all the necessary files for the theme.
  • "license.txt" -contains license details
  • "readme.txt" -contain information about theme images path, font use and usage script

TG KEY ACTIVATION

The steps for activating a TG Key are as follows:

As you will get the License Key on your Email, use that key to Activate License.

Follow the following Process to Activate License.

Go to Dashboard >> Appearance >> TG Key Activation >> Enter Key>>Save Changes.

After Entering The Key >> Activate Licence.

After you Activate Licence,the key will be active and then you can Getstarted with the Theme.

This is how you can activate your Licence Key.

Template Installation

Installing a template is a simple process. There are two ways to complete the installation process.

1-Using WordPress admin, install a theme.

The first step is to log in to your WordPress admin dashboard. then click on

1.Go to the menu Appearance >> Themes


2. Click the Add New button at the top of the themes page after you've arrived there.


3.Click on upload theme button.


4.Choose your multipurpose-portfolio-pro.zip theme by clicking the Browse button, and then click the "install now" button.


You've successfully installed your theme, congrats!

2-Install a Theme using FTP

The theme can be uploaded using FTP, which is your second installation option. To use this method, first log into your website using FTP and navigate to the wp-content/themes folder. Just extract the Total folder from the theme file you got and upload it to your server.


Next log into your WordPress site and navigate to Appearance >> Themes to activate Total.

Plugin Installation.

To manually install a WordPress plugin using a.zip archive, follow the instructions below for uploading the plugin.

Install Required Plugins:

multipurpose-portfolio-pro-posttype and contact form 7 plugin.

Go to Dashboard >> Plugins >> Add new >>Upload plugin.

click on the install now button and activate.

One-Click Demo Content Importer

To set up your theme, simply click to import sample content. You can follow the instructions in this article to develop your website for website creation.

Go to Dashboard >> Appearance >> Get started

You must first install the "Multipurpose Portfolio Pro posttype" plugin and the "Contact Form 7 plugin" before you can "Run Importer"

Click on"Run Importer".

Section Color/Font Pallette

The method of changing the colour or font is quite simple. These choices are available in all customizer areas. It is a comprehensive graphic that demonstrates the typeface and colour palette. You can change the colour and font of the headings, paragraphs, and buttons with a single click.

Depending on the number of options accessible in each area, there is an option to change the colour scheme for the headings, title/text, paragraphs, button text, and button background.

Default Color/Font settings

Fetch Demo content

This theme supports the standard Site Identity area that WordPress provides, and we have added some options to this section.

Follow these instructions to setup Home page.

  • To set a template for a new page, navigate to the Dashboard, click on Pages, and then select Add New Page. Give the page a name, such as "Home," or any other desired label. Next, choose the "home-page" template from the dropdown menu of available templates.


  • 2. Set the front page: Go to Setting -> Reading --> Set the front page display static page to home


  • When you're finished, you can view the entire demo on the top page.

How to set up Home Page

Setup Section Ordering

How to Arrange and Reordering Section

To reorder a part simply means to arrange it according to our needs. Drag the segment to the top or bottom as necessary to continue with this section. Your front view will alter in accordance with the customizer settings when you drag any portion to the top or bottom.

You can reorder sections by simply dragging and dropping the options into the desired order.

In order to continue with Section Ordering.

Step 1 Go to Dashboard >> Appearance >> Customizing >> Theme Settings >> Section Ordering

Setup Site Identity

In order to continue with Site Identity ,

Go to Appearance >> Customize >> Site Identity


Setup Top Bar


In order to continue with top bar Section,

Go to Appearance >> Customize >> Theme Settings >> Top Bar section


For Social Icons,

Go to Appearance >> Customize >> Theme Settings >> Social Icons section.


This is how you can setup Topbar section.

Setup Header


In order to continue with Header section, create pages first.

Go to Dashboard >> Pages >> Add New


Then make a menu and include the newly created pages in it. See the screenshot below for additional information.


This is how you can add header menus.

Setup Slider


To set up the slider, follow to the steps below.

Go to Appearance >> Customize >> Theme Settings >> Slider Settings


This is how you can setup Slider section.

Setup Services Section


In order to continue with the Services section,

Go to Appearance >> Customize >> Theme Settings >> Services Sections


This is how we can setup Services section.


Setup About Section


In order to establish the About section, follow the below steps

1. Go to Appearance -> Customize -> About Section.


This is how you can setup About Section.

Setup Portfolio Section


In order to continue with Portfolio Section, you need to install and activate "Multipurpose Portfolio Pro Posttype Plugin".

After this plugin is activated, a project option appears in the dashboard.

You must first create categories before you can create a portfolio. to include categories.

Go to Dashboard >> Project >> Project Category.


Go to Dashboard >> Project >> Add New


In order to continue with Portfolio,

Go to Appearance >> Customize >> Theme Settings >> Portfolio Section.

Choose the background colour, title image, number of tabs, category, and add any further information. See the screenshot below for additional information. The projects for the designated category will appear when you click on any tab. Choose how many projects you want to display for the category.


This is how you can setup Portfolio Section.

Our Features Section


In order to establish the following section go to Appearance -> Customize -> Theme Settings -> Our Features Section.

For better understanding refer the below screenshot.


This is how you can setup Our Features Section.


Setup Skills Section


In order to continue with Skills Section ,

Go to Appearance >> Customize >> Theme Settings >> Skills Section.


Add video url and video image here.


This is how we can setup Skills Section.

Setup Sponsor And Records Section


In order to establish Sponsor and Records Section,

Go to Appearance -> Customize -> Theme Settings ->Records.

Select Background Color And Image.


For Record, select the counter image and enter title. Refer the below screenshot for more details.


This is how you can setup Sponsor and Records Section

Setup How We Work Section


Go to Appearance -> Customize -> Theme Settings ->How We Work Section.

Select title image, number of titles, title and icon image.


This is how we can add How We Work Section.

Setup Team Section


In order to establish team section, first we need to install and activate Multipurpose Portfolio Pro Posttype plugin.

When this plugin is activated, a team option is displayed in the dashboard. forming a team

Go to Dashboard -> Team -> Add New.

Refer the below screenshot for more details.


Go to Appearance -> Customize -> Theme Settings -> Team Section.

See the screenshot below for additional information.


This is how we can setup Team Section.

Setup Latest Blog Section


In order to establish Latest Blog Section, first you need to create category and posts.

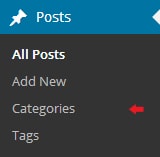
For Category, Go To Dashboard -> Posts -> Categories.


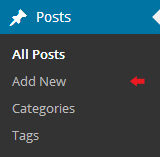
For Posts, Go To Dashboard -> Posts -> Add New.

Assign the category to the post. Refer the below screenshot for more details.


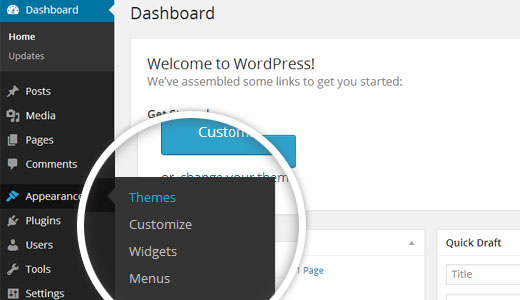
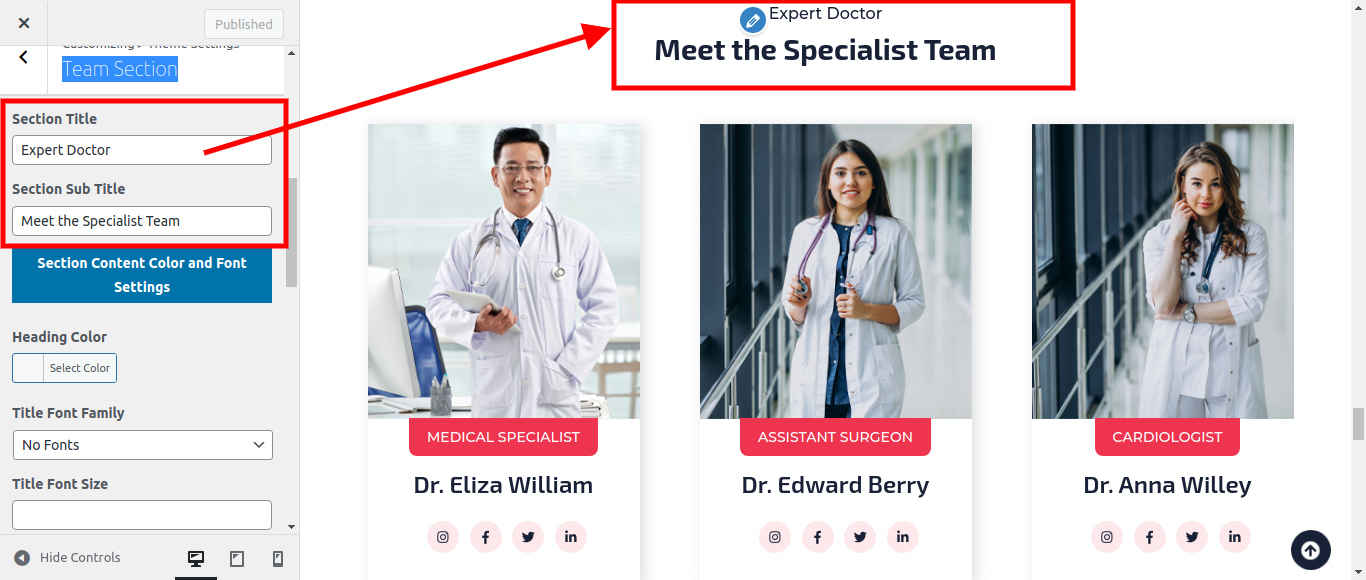
Go To Appearance -> Customize -> Theme Settings -> Latest Blog Section.

To display the posts at the front, choose the category that corresponds to the post.


Get In Touch

For Get in Touch part, we need to install and activate Contact Form 7 Plugin.

In order to establish the following section go to Dashboard -> Contact -> Add New

Create contact form and copy the shortcode.


Go to Appearance -> Customize -> Theme Settings -> Latest Blog


For further information, see the screenshot below and paste the shortcode in the newest blog section..


This is how, we can setup Latest Blog Section.

Setup Testimonial Section


First activate "Multipurpose Portfolio Pro Posttype" plugin. Then only you can add Testimonial.

In order to establish the following section Go to Dashboard -> Testimonials -> Add New.

Create Testimonial. Refer the below screenshot for more details.


Go to Appearance -> Customize -> Theme Settings -> Testimonial.


This is how we can setup Testimonial Section.

Setup Footer Section


In order to continue with Footer Contact , Enter the details. Refer the below scrrenshot for details.

Go to Appearance -> Customize -> Theme Settings -> Footer


For Instagram, you need to install and activate "Instagram Feed" Plugin.

Go to Dashboard -> Instagram. . For instagram settings, go to instagram and then click on customize and do the settings. Refer the below screenshot for more details.


Copy instagram shortcode and paste it in footer section.


This is how you can setup Footer Section.

Copyright Text


In order proceed with copyright text, go to Appearance -> Customize -> Theme Settings -> Copyright Text. Select logo and add text here.


This is how you can add Copyright Text.

Setup Contact Page


In order to continue with Contact Page, First you need to install and activate Contact Form 7 Plugin.

After activating this plugin, Contact option appears in dashboard.

Go to dashboard -> Contact -> Add New.


Copy contact shortcode and paste it in customizer Contact section.

Go to Appearance -> Customize -> Theme Settings -> Contact.


Enter contact details like address, email, phone and working hours.


This is how you can setup Contact Page.

Single Post Page Settings


In order to continue with Post General Settings ,

Go to Appearance -> Customize -> Theme Settings -> Post Page Settings


Plugins

Plugins are ways to extend and add to the functionality that already exists in WordPress.

How to activate plugins

If you want these features in your theme, you must activate the plugin. In order to activate the plugin in your theme, follow these instructions.

Go to Plugins >> Installed Plugins >>Multipurpose Portfolio Pro Posttype >>Activate


After you activate the plugin, the dashboard will display Contact, Team, Project, Testimonial, and Instagram.

As soon as you activate the plugin, these four sections show on your website immediately. You may want to look at the screenshot of the same.

You can see that some sections have been added, but their contents are missing. Use these guidelines when adding content to these areas.


Page Templates and sidebars

Page Templates

  • Default Template (the default page template with a right sidebar position)
  • Blog Full Width Extend (a blog templates with one column without sidebar)
  • Blog With Left Sidebar (a blog templates with left sidebar position)
  • Blog With Right Sidebar (a blog template with right sidebar position)
  • Contact (the default Contact template with no sidebar position)
  • Home Page (the default home page template with right sidebar position)
  • Page With Left Sidebar (a page templates with left sidebar position)
  • Page With Right Sidebar (a page template with right sidebar position)

Post, Categories and Post Formats


Adding category

For further details on adding categories, look at the following article:http://codex.wordpress.org/Manage_Categories_SubPanel

  1. Log into your WordPress Administration Panel (Dashboard).
  2. Click the Posts tab.
  3. With that done, click Categories for blog posts.
  4. Type in the name of your new category.
  5. After that, click the Add New Category button.
Click the Publish button.

Creating a Blog post

  1. Enter the WordPress Administrative Panel (Dashboard).
  2. Click the Posts tab.
  3. Click the Add New tab.
  4. Type in your post content. For more information on adding posts, please check the following link http://codex.wordpress.org/Posts_Add_New_SubPanel.

Shortcodes

A shortcode is an effective tool for creating content. http://codex.wordpress.org/Shortcode. Using shortcodes is simple. Make sure that Visual editing mode is selected first.


Check the list of shortcodes that are available with the Themes:

  • [multipurpose-portfolio-pro-team]
  • [multipurpose-portfolio-pro-project]
  • [multipurpose-portfolio-pro-testimonials]

Shortcode

Team Shortcode Page


For others, you can create a shortcode page in a similar manner.