


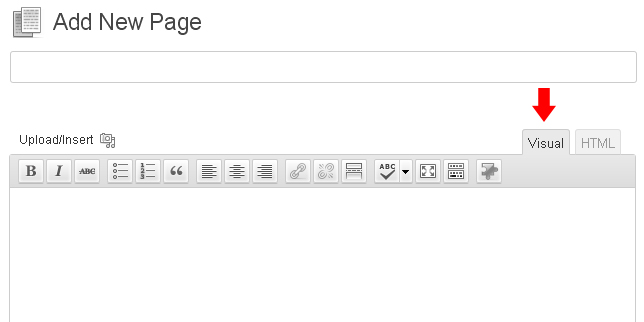
The process of installing a template is very straightforward and easy.
1-Using WordPress admin, install a theme.
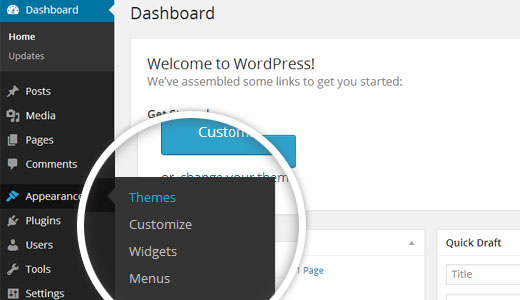
The first step is to log in to your WordPress admin dashboard. then click on
1.Go to the menu Appearance >> Themes
You're welcome for purchasing our WordPress theme. This documentation's several sections each demonstrate how to set up and administer a WordPress website from scratch.
WordPress is an open source website creation tool that uses PHP and MySQL as its foundation. It is a robust blogging platform and a totally free content management system (CMS). Using this CMS, you may create reliable online applications and websites. To manage it, you scarcely need any technological expertise or understanding. Because of its many benefits, including ease of use and flexibility, WordPress has emerged as the most popular website construction tool on the market.Learn More
A WordPress template serves as the skin for websites built using the WordPress content management system. A WordPress template is incredibly simple to setup. You may quickly modify the appearance of your WordPress website by installing a new template. A WordPress template comes with all the necessary source files, and you are free to change and expand it however you see fit.
The template bundle that you downloaded is divided into various directories. Let's examine the contents of each folder:
The steps for activating a TG Key are as follows.
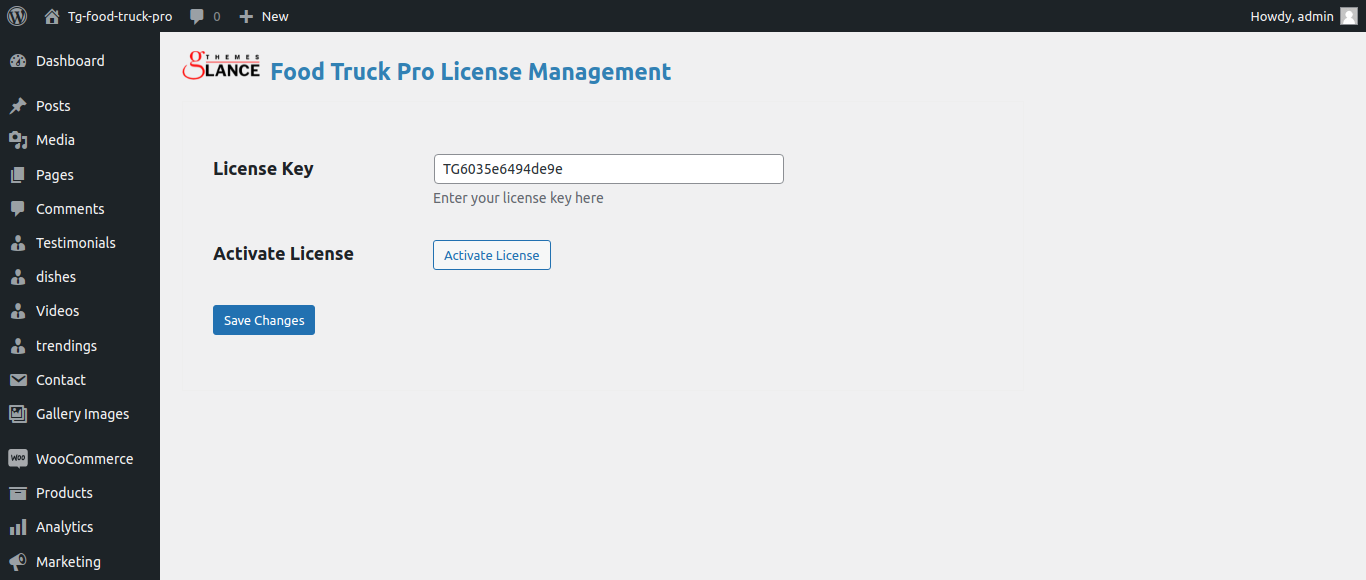
Use the License Key that you will receive through Email to Activate licence.
The process to Activate a Licence is as follows.
Go to Dashboard >> Appearance >> TG Key Activation >> Enter Key>>Save Changes.
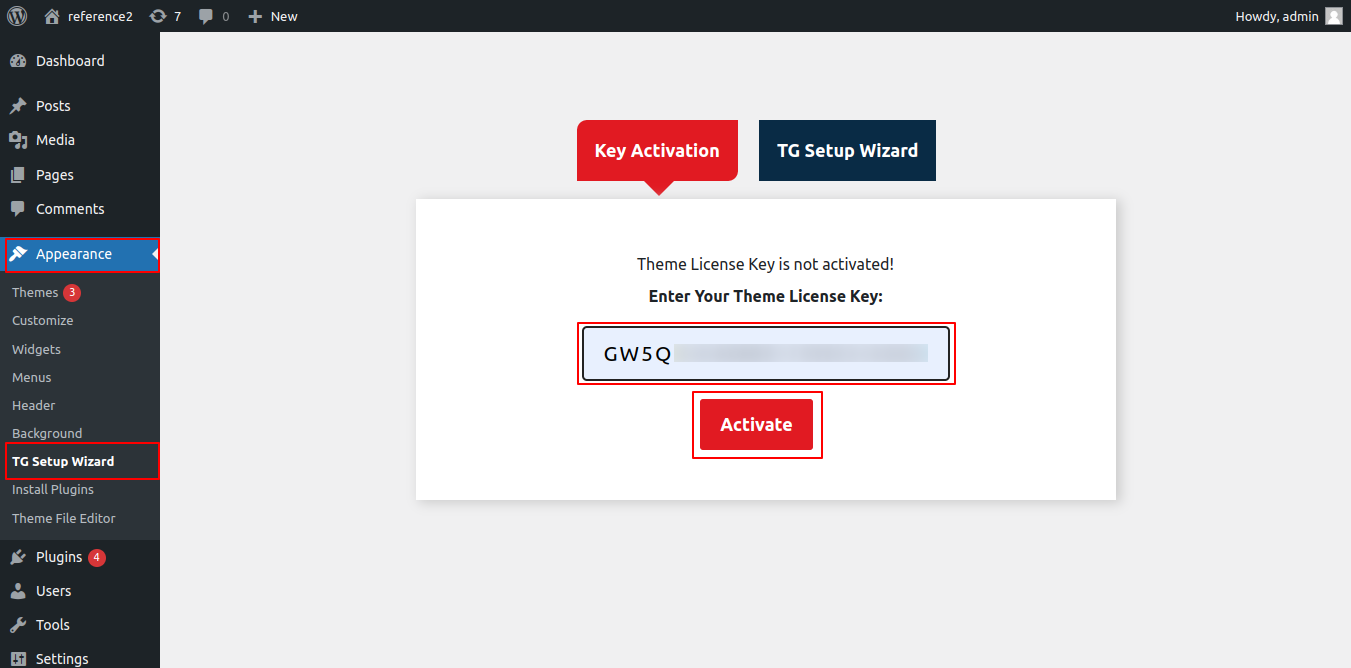
After Entering The Key >> Activate Licence.
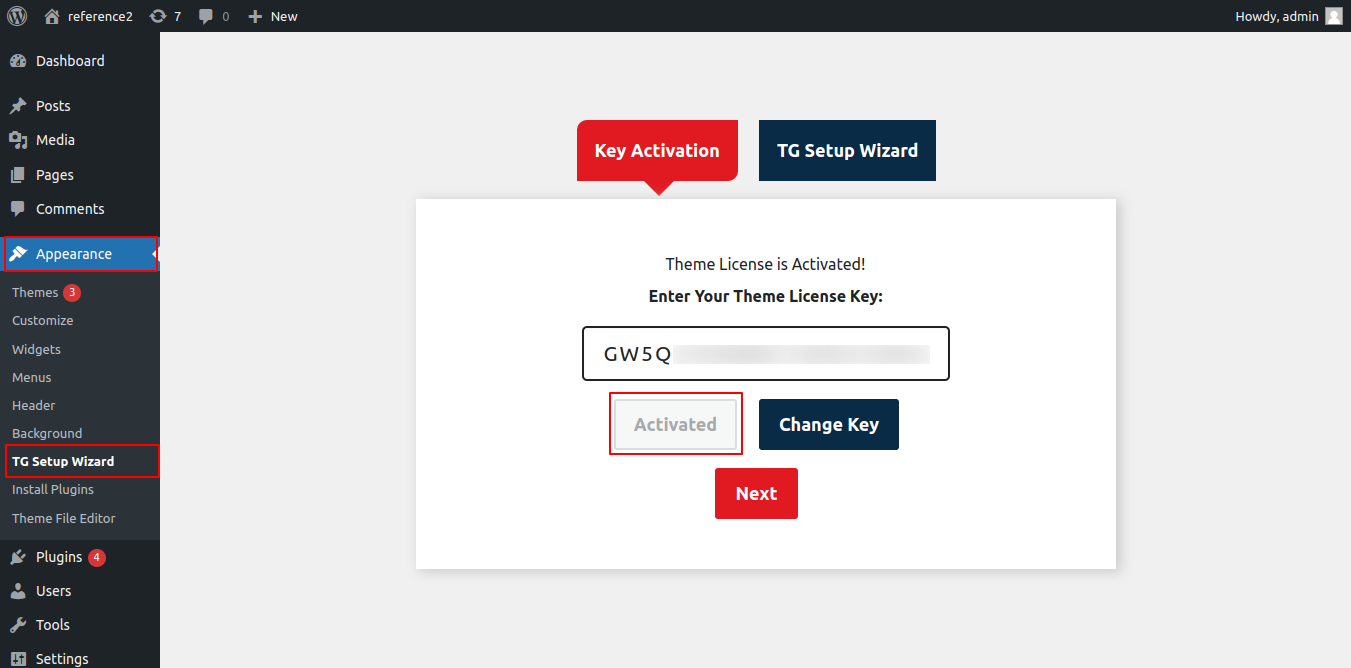
After you Activate Licence,the key will be active and then you can Getstarted with the Theme.
You can activate your Licence Key. in this manner.
The process of installing a template is very straightforward and easy.
The first step is to log in to your WordPress admin dashboard. then click on
1.Go to the menu Appearance >> Themes
Once you are on the themes page, click on the "Add New" button located at the top of the page.

3. Click on upload theme button.
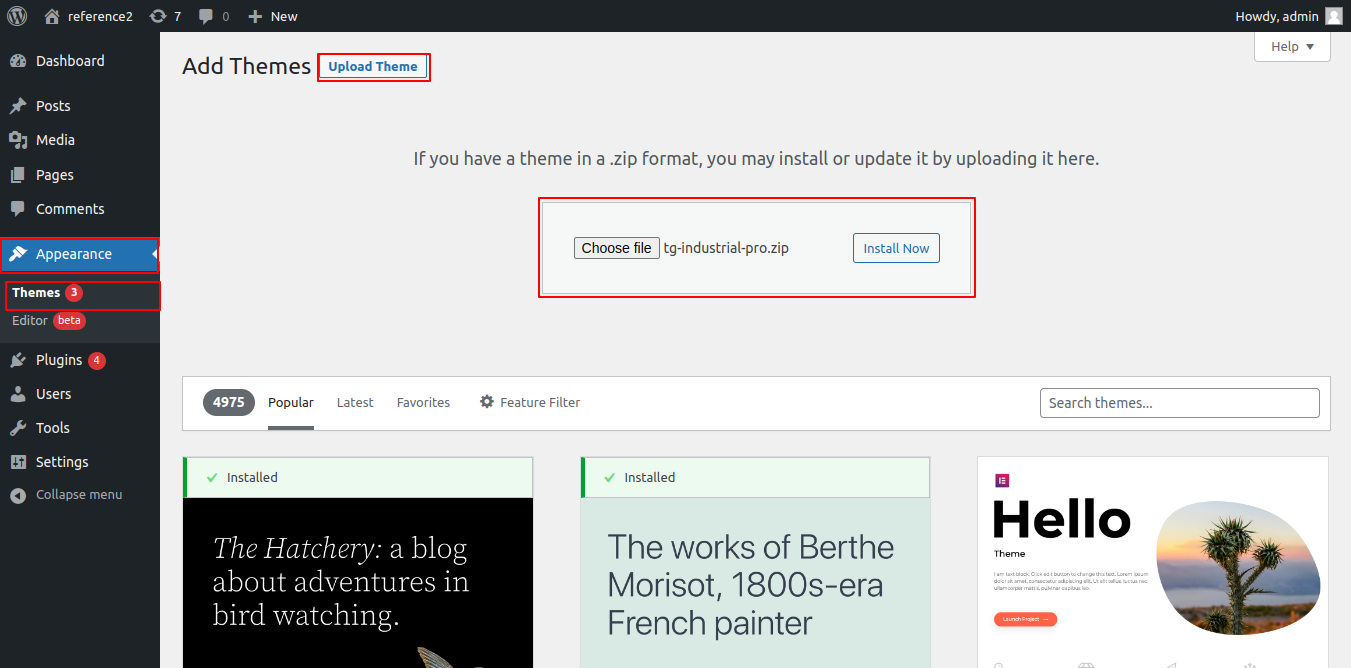
4. Click the "Browse Button", select the driving-school-pro.zip theme, and then click the "Install Now Button".
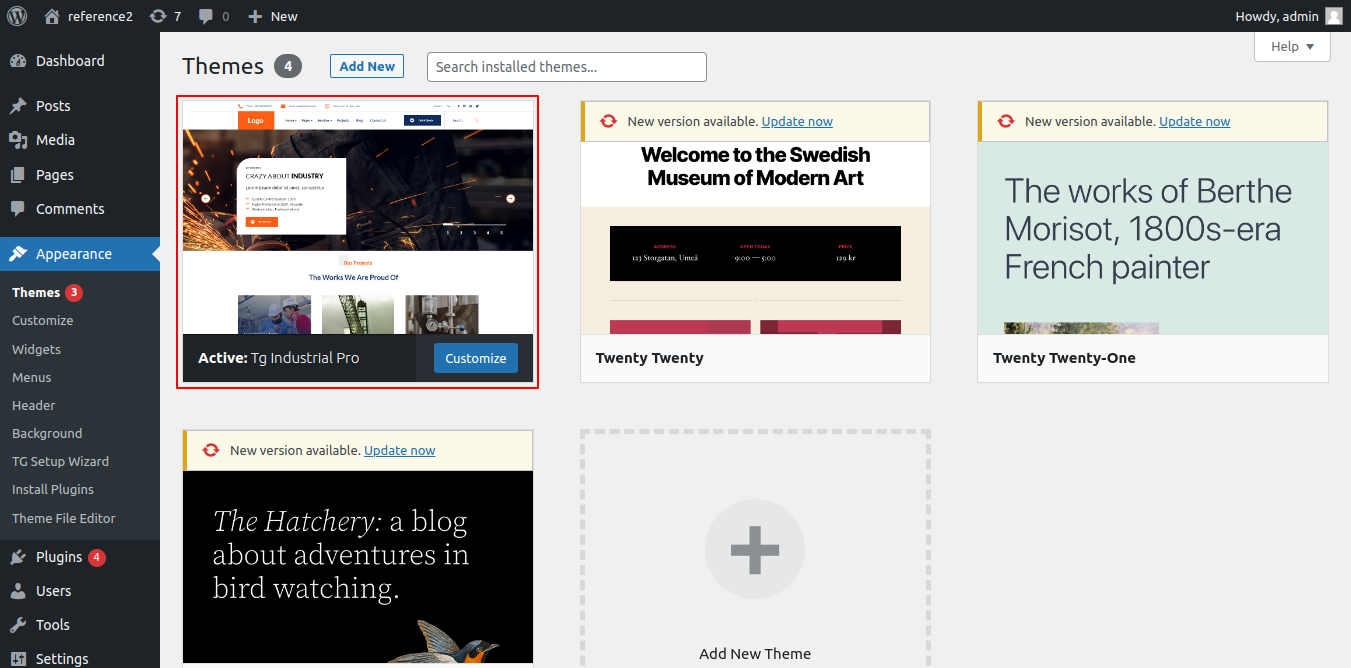
Congratulations! Your theme has been successfully installed.
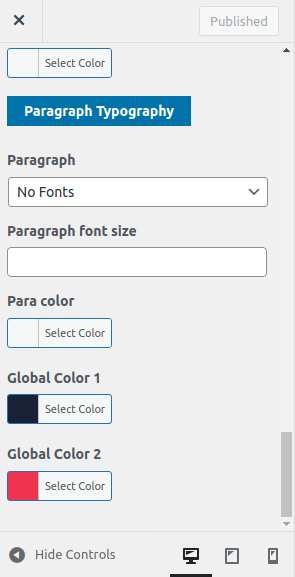
The method of changing the colour or font is quite simple. These choices are available in all customizer areas. It is a comprehensive graphic that demonstrates the typeface and colour palette. You can change the colour and font of the headings, paragraphs, and buttons with a single click.
Depending on the number of options accessible in each area, there is an option to change the colour scheme for the headings, title/text, paragraphs, button text, and button background.
Go toDashboard >> Appearance >> Get started
You must first install the "driving school pro posttype" plugin before you can "Run Importer."
Click on"Run Importer".

Set up your home page by following these instructions.
You can label it anything you like, such as "home." then choose the "Home page" template from the template options.

When you're finished, you can view the entire demo on the top page.
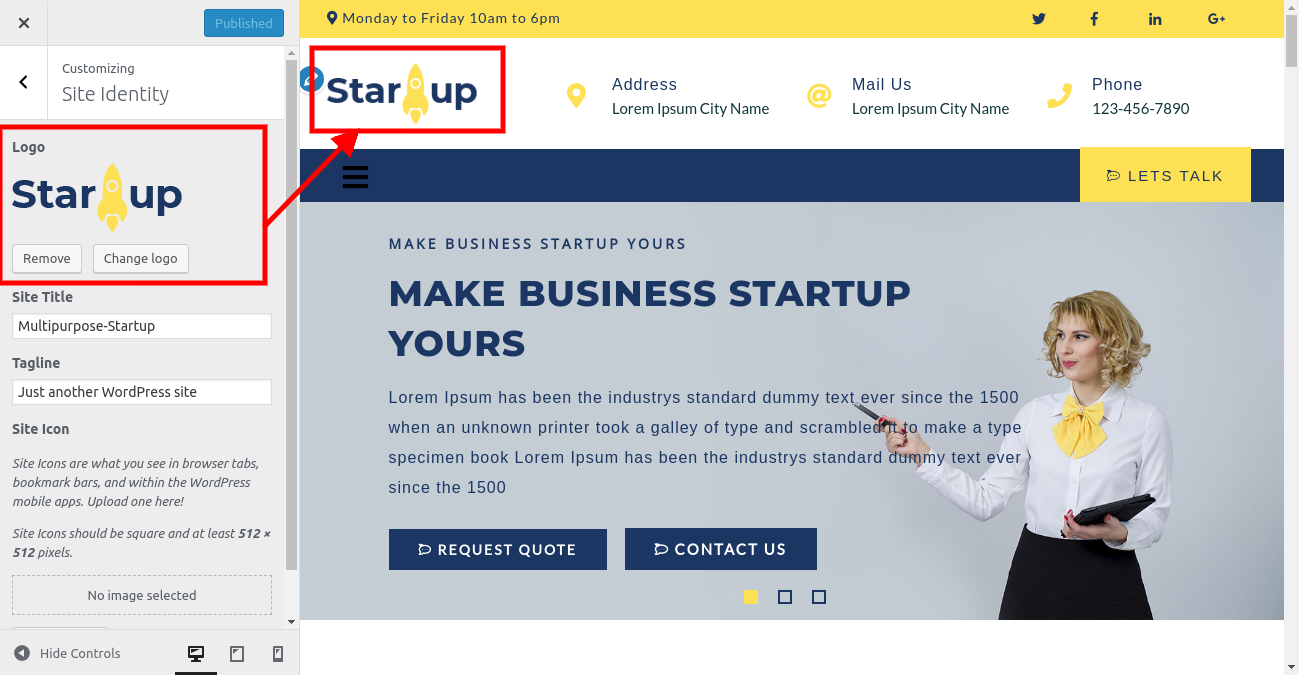
Setting up site Identity requires:
Go to Appearance >> Customize >> Site Identity Section

The result of the site Logo will appear as follows.

To proceed with the "Topbar" section,
Go to Appearance >> Customize >> Theme Setting >> Topbar Section

This is how Top Bar's output will seem.

To proceed with the "Social Icon" section,
Go to Appearance >> Customize >> Theme Settings >> Social Icon Section
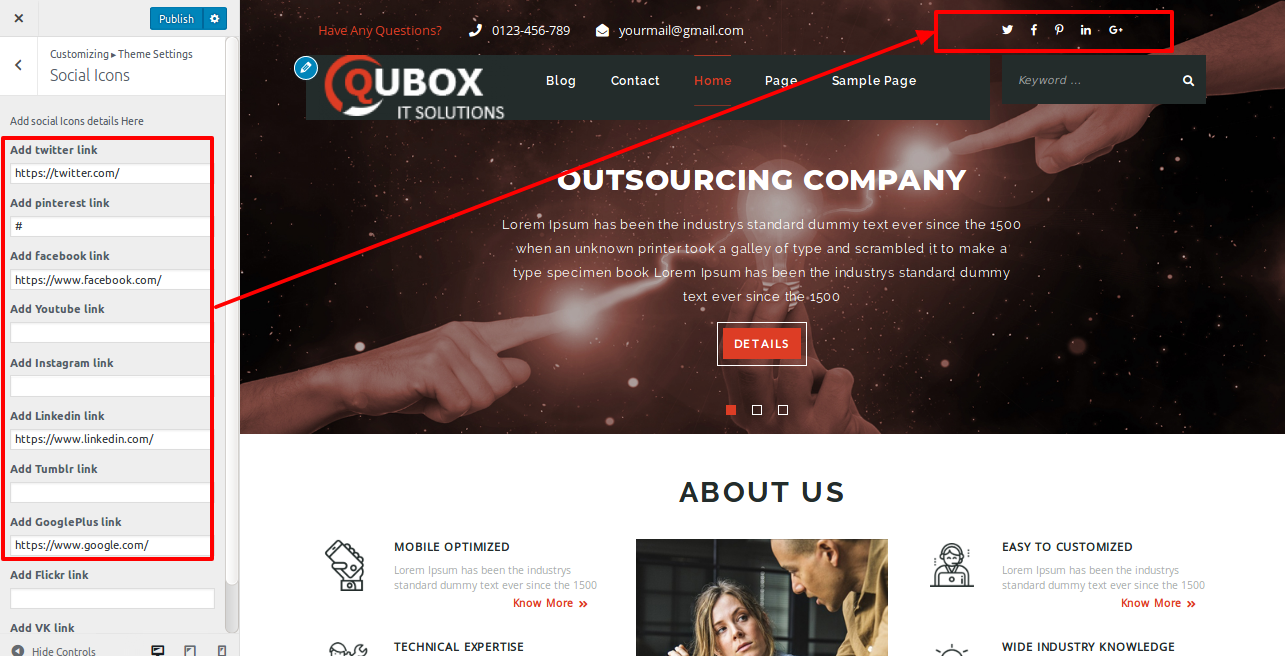
This is how Social Icon's output will seem.

To set up the slider, adhere to the procedures below.
Go to Appearance >> Customize >> Theme Settings >> Slider Settings

The output will look like this.
To proceed with the "Our Features" section,
Go to Appearance >> Customize >> Theme Settings >> Our Features


This is how Our Features' output will seem.

To proceed with the "About Driving School" section,
Go to Appearance >> Customize >> Theme Settings >> About Driving School

This is how About Driving School's output will seem.

See the plugin section for more information.
1. Go to the following link to set up the section.Dashboard >> Courses >> Add New

2. Add the testimonial, Go to Appearance >> Customize >> Theme Settings >> Our Driving Courses

This is what the results of Our Driving Courses will look like.

See the plugin section for more information.
1. Go to the following link to set up the section. Dashboard >> Gallery >> Add New

Gallery Shortcode show below :

2. Add the Gallery, Go to Appearance >> Customize >> Theme Settings >> Our Gallery

This is what Our Gallery's output will be like.

See the plugin section for more information.
1. Go to the following link to set up the section.Dashboard >> Instructors >> Add New

2. Add the Instructors, Go to Appearance >> Customize >> Theme Settings >>Qualified Instructors

This is what qualified instructors will produce.

To proceed with the "Video" section,
Go to Appearance >> Customize >> Theme Settings >> Video Section

This is how Video's output will seem.

To move on to the section under "Course Price Plans,"
Go to Appearance >> Customize >> Theme Settings >>Course Pricing Plans

This is how Course Pricing Plans' output will seem.

To proceed with the "Our Records" section,
Go to Appearance >> Customize >> Theme Settings >>Our Records

This is how Our Records' production will appear.

See the plugin section for more information.
1. Go to the following link to set up the section. Dashboard >> FAQS >> Add New

2. Add the Our Faqs, Go to Appearance >> Customize >> Theme Settings >>Our Faqs

This is how Our Faqs' output will seem.

See the plugin section for more information.
1. Go to the following link to set up the section. Dashboard >> Contact >> Add New

2. Add the Book Class, Go to Appearance >> Customize >> Theme Settings >>Book Class

This is how Book Class' output will seem.

See the plugin section for more information.
1. Go to the following link to set up the section.Dashboard >> Graduates >> Add New

2. Add the Graduates, Go to Appearance >> Customize >> Theme Settings >>Our Graduates

This is what Our Graduates' work will produce.

To proceed with the "Our Partners" section,
Go to Appearance >> Customize >> Theme Settings >>Our Partners

This is what Our Partners' final product will resemble.

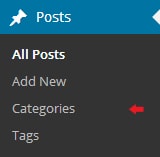
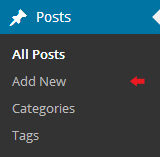
First You need to create post
Go to Dashboard >> Posts >> Add New

Go to Appearance >> Customize >> Theme Settings >> Latest Post

The result will appear as shown.

See the plugin section for more information.
1. Go to the following link to set up the section. Dashboard >> Contact >> Add New

2. Add the Newsletter, Go to Appearance >> Customize >> Theme Settings >>Newsletter

This is how Newsletter's output will seem.

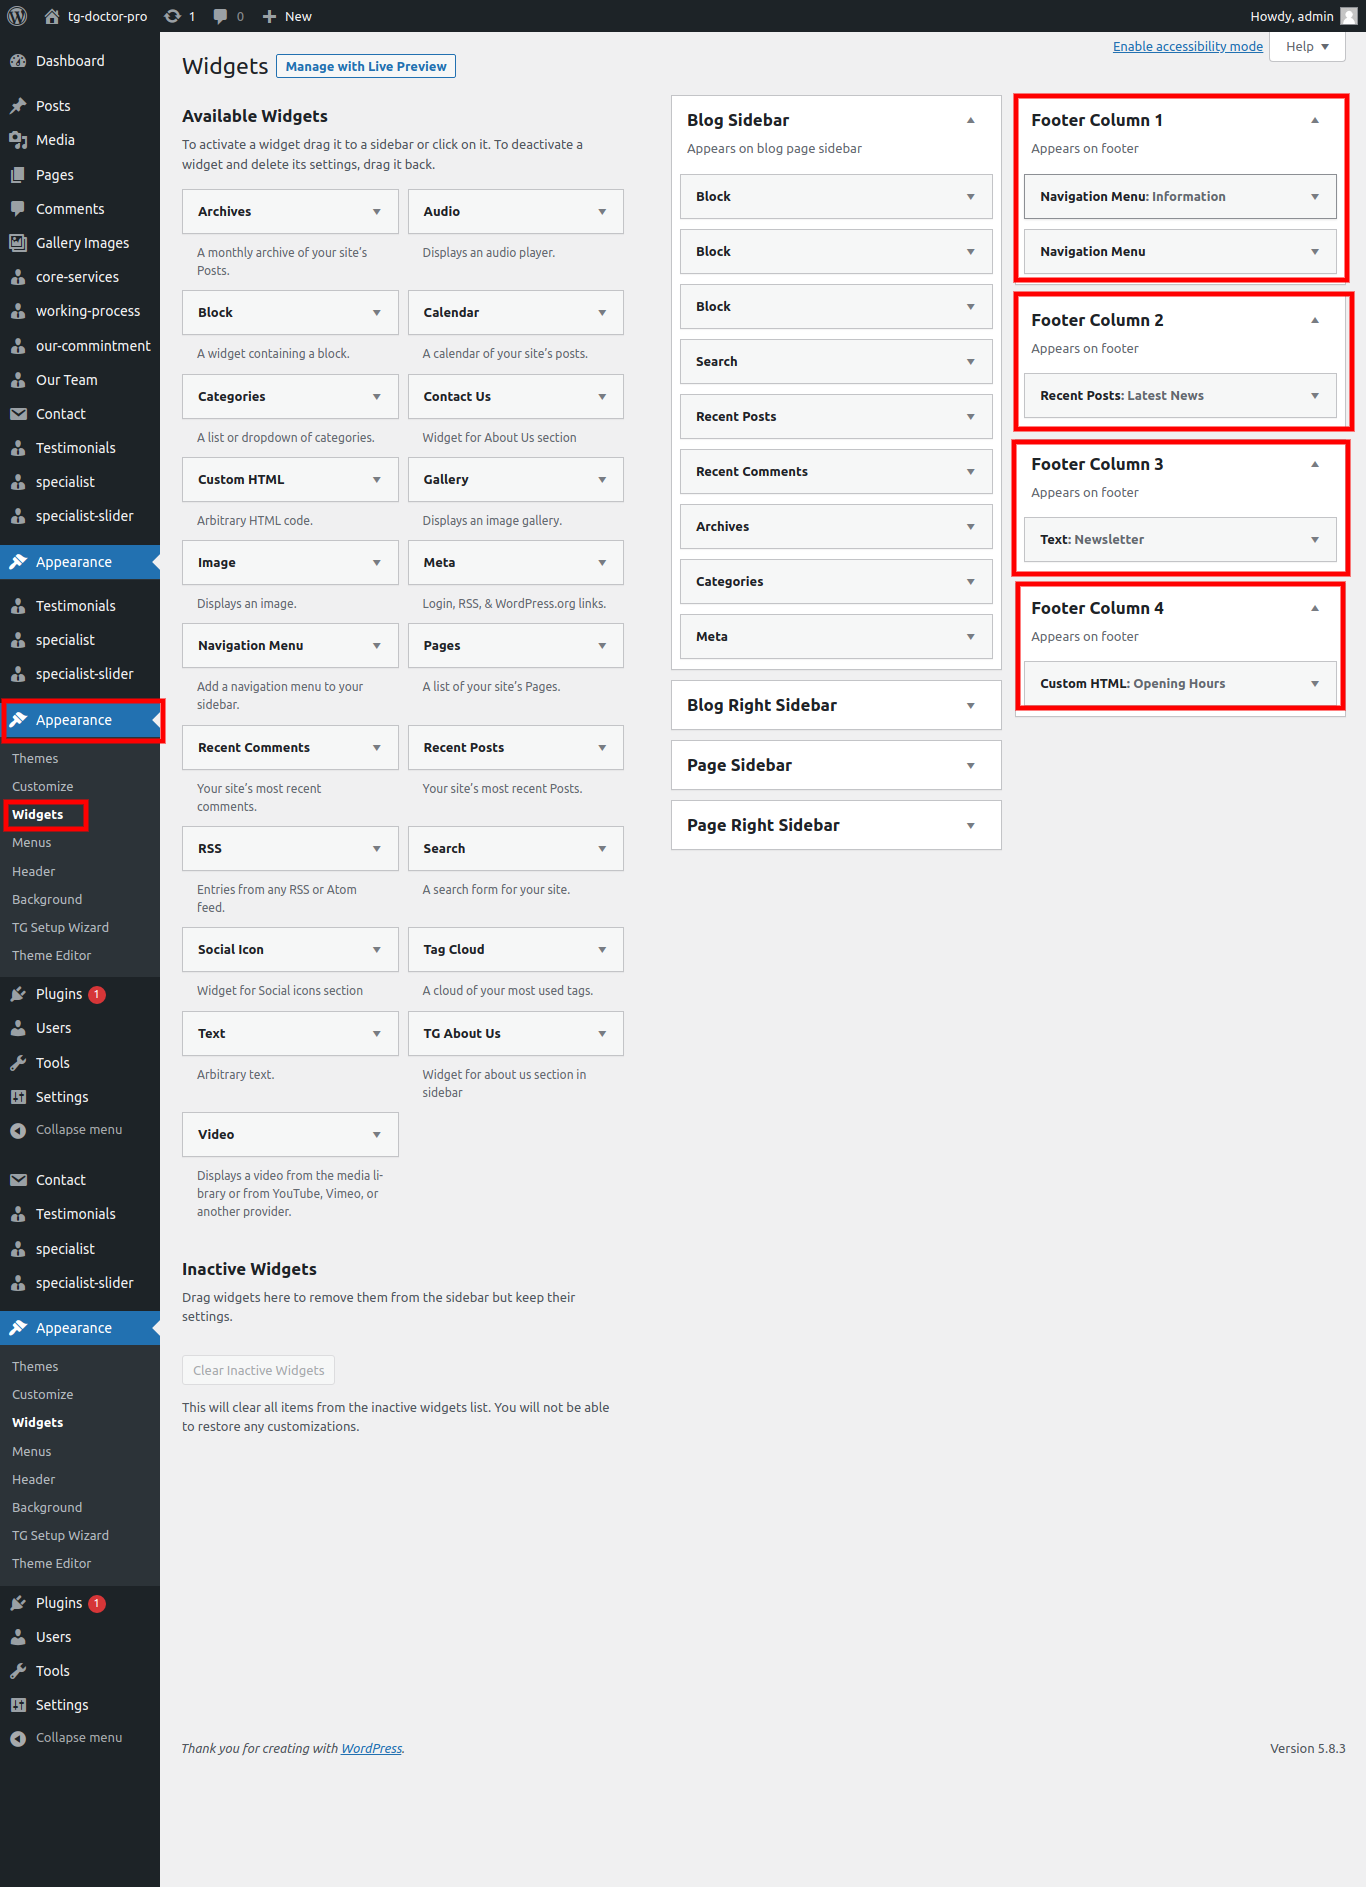
Four columns are in the footer. Any widget can be added there. The addition will come from Appearance >> widget

The result will appear as shown.
1.In order to prepare the next section,
Go to Dashboard >> Contact >> Add New

Go to Appearance >> Customize >> Theme Settings >> Contact

The result will appear as this.

1. In order to prepare the next section,
Go to Appearance >> Customize >> Theme Settings >> Footer Text

The result will appear as this.

If you want these features in your theme, you must activate the plugin. In order to activate the plugin in your theme, follow these instructions.
Go to Plugins >> Installed Plugins >> driving school pro posttype >> Activate

After you activate the plugin, five additional options—FAQs, Instructor, Graduates—appear in your admin navigation. Because the plugin is active, you may see these three options in the image's admin navigation.
Once you enable the plugin, these five sections are instantly added to your website. This is a screen image of the same.
You can see that some sections have been added, but their contents are missing. Use these guidelines when adding content to these areas.
To add Causes., Go to Dashboard. >> FAQs >> Add new


See this screenshot for better understanding.
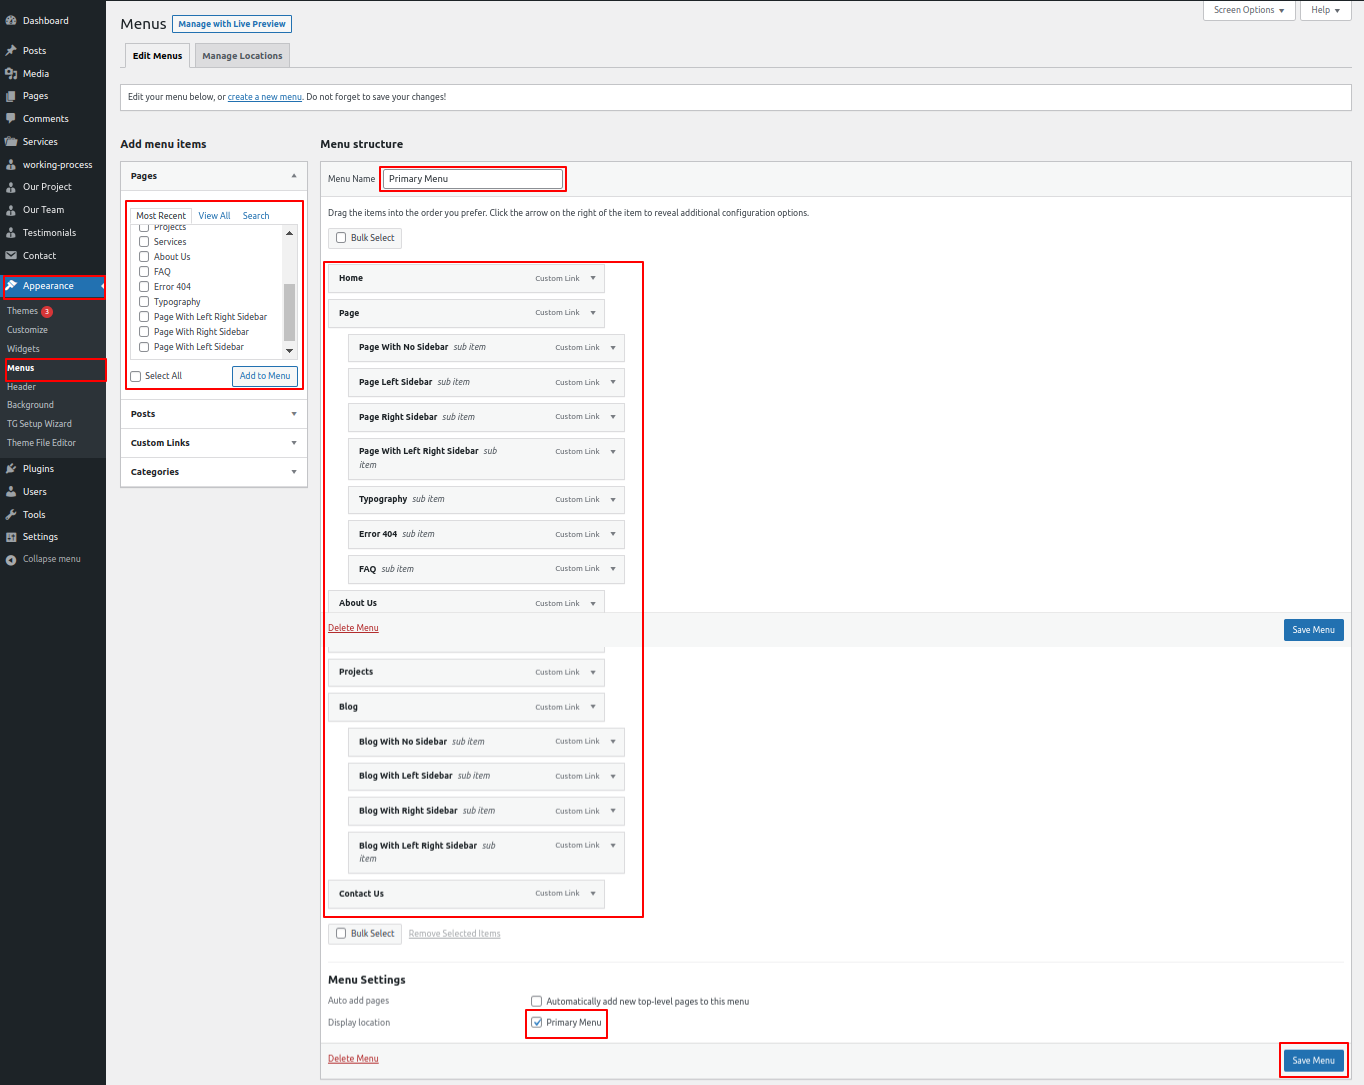
For further details on adding categories, look at the following article: http://codex.wordpress.org/Manage_Categories_SubPanel
Check the list of shortcodes that are available with the Themes:
To continue with the Widget section,
Go to Dashboard >> Appearance >> Widgets